Best Site to Buy Twitch Services

How to Change Stream Delay on Twitch – A Step-by-step Guide
Changing the stream delay on Twitch can significantly impact the quality of your streaming experience. Stream delay refers to the time gap between what is happening in real-time and what viewers see on your Twitch channel.
Adjusting this delay can be beneficial for various reasons, such as improving real-time interaction with your audience, enhancing competitive gaming, or preventing stream sniping. For instance, a shorter delay can make your audience feel more connected and engaged, while a longer delay can prevent cheating in competitive games. This guide will take you through the steps on how to change stream delay on Twitch, ensuring your settings are optimized for the best streaming performance.
Twitch has different types of delays, such as natural delay due to data transmission and intentional delay, which streamers can set to control the viewing experience.
By adjusting the delay settings, streamers can create a balance between low-latency interactions for casual streams like Q&A sessions and extended delays for competitive events such as eSports tournaments. Understanding these settings is crucial for any Twitch streamer looking to create an engaging and secure environment.
Adjusting Stream Delay on Twitch for Optimal Security and Viewer Engagement:
Whether you are a seasoned streamer or just starting out, knowing how to change stream delay on Twitch can help you better control your broadcast and tailor it to your needs. For streamers focused on competitive gameplay, increasing the delay can help prevent stream sniping, a practice where opponents use your live stream to gain an advantage.
Meanwhile, reducing the delay can create more interactive and engaging experiences with viewers during casual streams or community events.
In the following sections, we’ll provide a step-by-step guide on adjusting stream delay directly from Twitch’s settings and through popular streaming software like OBS and Streamlabs.
We will also discuss best practices and tips for selecting the appropriate delay for different streaming scenarios. So, let’s explore how you can optimize your Twitch stream delay to enhance both security and viewer engagement.
What is Stream Delay on Twitch?
Stream delay on Twitch is the time difference between when a live event occurs and when it is displayed to viewers on their screens. This delay can range from a few seconds to several minutes, depending on various factors like internet speed, server load, and streaming software settings.
For most streamers, the data transmission process causes a natural delay of about 10-15 seconds. However, Twitch also allows streamers to set an intentional delay, which can be useful for certain types of streams, such as competitive gaming or private events.
Understanding stream delay on the Twitch streaming platform is essential for managing your channel effectively. The natural delay cannot be eliminated, but it can be minimized by optimizing your network settings– and using low-latency streaming options available on Twitch.
Understanding and navigating both types of delays will allow you to adapt your stream to your audience’s expectations and your content style, making you more responsive to different streaming scenarios.
If you are looking to minimize the delay to enhance real-time interaction with viewers, enabling Twitch’s low latency mode is a good option. This setting reduces the delay as much as possible without compromising stream quality.
Conversely, an intentional delay can be added directly from your streaming software or Twitch dashboard. In the following sections, we will explore the reasons why you might want to adjust these settings and how to change stream delay on Twitch to achieve your desired streaming experience.
Reasons to Adjust Stream Delay on Twitch:
There are several reasons why a Twitch streamer might want to adjust the stream delay settings. Enhancing competitive gameplay is a crucial reason for increasing stream delay, especially for streamers in eSports or competitive gaming.
Increasing stream delay prevents opponents from using the live stream to gain an advantage, a tactic called stream sniping. Stream sniping is when a player uses a stream to see their opponent’s actions in real time, giving them an unfair advantage. By adding a longer delay, streamers can secure their strategies and gameplay, ensuring fair competition.
Another crucial reason for changing stream delay on Twitch is to enhance audience engagement. Reducing the delay fosters more real-time interaction, making the streaming experience more dynamic and enjoyable for viewers, who are integral to the streaming experience.
This is especially valuable for casual streams, Q&A sessions, or community events where timely viewer feedback and interaction are critical components of the content.
Enhancing Security and Privacy with Stream Delay
Security and privacy are also significant considerations. Some streamers may want to maintain a delay to avoid broadcasting sensitive information in real-time. For example, if you are sharing personal information or engaging in content that could potentially lead to privacy concerns–, a delayed stream can offer an extra layer of protection.
Adjusting the delay can help you manage these risks better while providing a safe environment for both the streamer and the audience.
Ultimately, the decision to adjust stream delay depends on your specific streaming goals and audience expectations. By knowing how to change stream delay on Twitch, you can optimize your stream settings for a better viewing experience and enhanced content control.
In the following section, we will explain how you can change your Twitch stream delay settings.
Step-by-Step Guide: How to Change Stream Delay on Twitch?
To adjust the stream delay directly from Twitch, follow these simple steps to optimize your streaming experience. The process is straightforward and can be completed in just a few minutes.
Here’s how to change stream delay on Twitch through your Twitch Dashboard:
- Open Your Twitch Dashboard:

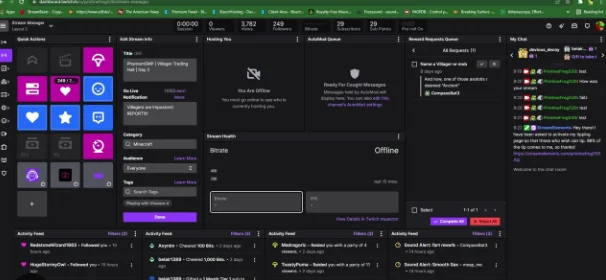
Start by logging in to your Twitch account and accessing the Twitch Dashboard. You can find this option by clicking on your profile icon in the top-right corner and selecting Creator Dashboard from the dropdown menu.
- Access Stream Settings:

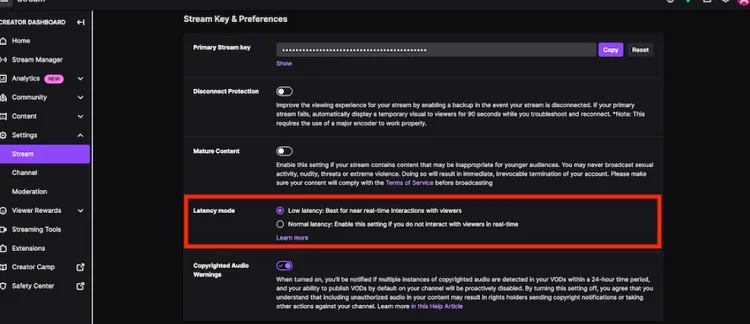
Once in the Creator Dashboard, navigate to the Settings section on the left-hand menu and click on Stream. This will open the main settings page where you can manage various aspects of your Twitch stream, including the stream delay.
- Adjust Stream Delay Settings:
Scroll down to find the Latency Mode or Stream Delay settings. If you want a minimal delay for better audience interaction, choose Low Latency Mode. If you prefer to add a specific delay, enable Stream Delay and enter the desired duration in seconds or minutes.
- Save Changes and Test Stream Delay:
After making the necessary adjustments, be sure to click Save Changes at the bottom of the page. It’s a good practice to test your stream with the new settings to ensure everything is working correctly and to check the impact on both stream quality and viewer experience.
By following these steps, you can easily change the stream delay on Twitch to suit your streaming style, whether you aim for real-time interaction or a more controlled viewing experience.
How to Change Stream Delay Using Streaming Software (OBS, Streamlabs)?
Changing stream delay on Twitch is not limited to the platform’s settings. Popular streaming software like OBS Studio and Streamlabs OBS provide additional flexibility in adjusting the stream– allowing you to have more control over your broadcast.
Here is a quick guide on how to change stream delay using these tools:
- Adjusting Stream Delay on OBS Studio:
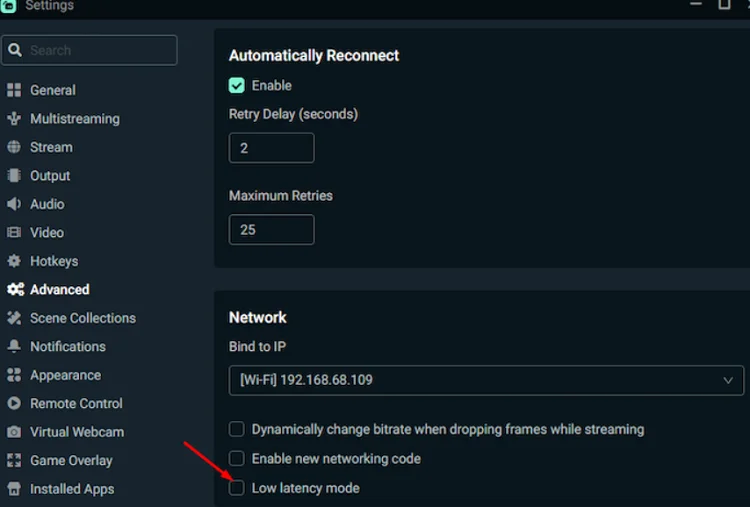
Open OBS Studio and go to Settings in the bottom-right corner. Navigate to the Advanced tab, and under the Stream Delay section, enable the Enable Delay option. Set your preferred delay duration and click Apply to save the changes.
OBS allows for fine-tuning, giving you more precise control over how much delay you want.
- Adjusting Stream Delay on Streamlabs OBS:

The process is similar in Streamlabs OBS. Open Settings, go to the Advanced tab and locate the Stream Delay section.
Now, check Enable Delay, set the desired time in seconds or minutes, and save the changes. Streamlabs OBS is user-friendly and provides an intuitive interface for setting upstream delays.
- Using Third-Party Streaming Software:
Other software, such as XSplit and vMix, also has similar settings for adjusting stream delay. While the interface may differ, the process generally involves navigating to the stream settings and enabling a custom delay.
By using these methods, you can change stream delay on Twitch without relying solely on the platform’s settings, offering more tailored options to fit your streaming needs.
Expand Insights: How To Fake Donate On Twitch Streaming Platform?
Common Issues When Changing Stream Delay on Twitch and How to Fix Them:
Learning how to change stream delay on Twitch can significantly enhance your streaming experience. However, streamers often need help with adjusting these settings. These problems can affect stream quality, viewer experience, and the effectiveness of the delay itself.
Understanding these issues and knowing how to troubleshoot them is essential for maintaining a smooth and professional stream. Let’s examine these issues and learn how to fix them easily.
Common Issue 1: Increased Buffering or Lag
One of the most frequent issues is increased buffering or lag for viewers. When the stream delay is set too high, it can cause a mismatch between the stream’s real-time processing and the data delivery rate– leading to buffering problems.
How to Fix Buffering or Lag?
Here are some potential tips you can use to reduce buffering or lag issues:
- Consider reducing the stream delay to a moderate setting.
- Activate this feature in your Twitch settings for better real-time interaction.
- Ensure that your internet connection is stable.
- Make sure your bitrate is set correctly to handle stream quality without causing excessive delays.
Common Issue 2: Misconfiguration in Streaming Software:
Another common problem is misconfiguration in streaming software like OBS Studio or Streamlabs OBS. Streamers may accidentally set a delay in both Twitch and their streaming software, resulting in a compounded delay that is much longer than intended.
How to Fix Misconfiguration Issues:
- Ensure that the delay setting on Twitch is correct.
- Double-check the delay settings in your streaming software.
- Use only one setting—either on Twitch or in the software—to avoid compounded delays.
Common Issue 3: Audio and Video Sync Issues
When changing stream delay, audio and video sync issues can occur, especially if you are using a complex setup involving multiple audio and video sources.
How to Fix Audio and Video Sync Issues
- In your streaming software, verify that the audio sync offset is correctly set.
- Test these settings in a private stream or with a small audience to ensure everything is aligned before going live to a larger audience.
Common Issue 4: Delayed Alerts or Overlays
Some streamers experience issues with delayed alerts or overlays not syncing correctly when stream delay settings are changed.
How do you fix alert and overlay sync issues?
- If you use third-party tools like Streamlabs or Streamelements for alerts and overlays, ensure they are configured to match the new delay.
- Set the alert delay in these tools to align with your Twitch stream delay for a cohesive viewing experience.
Conclusion:
At the end of our discussion on how to change stream delay on Twitch, things get so simple. There are a few steps you need to follow to make it happen. At BuyTwitchViewers.co, we have crafted this guide for you with all the essential information. In addition, we have also discussed the potential issues and ways to fix them.
So, read the above guide and learn how to change delays on Twitch with straightforward steps.


